
Introduction
We recently had the experience of installing one of the Ironwood Greenhouses! We decided to go with the Emilia 19.1m², and see what the process involved. This build took us about 1 day of preparation, and 1.5 days to install.
A few things to keep in mind before we get into this. The most important thing when building a log kit from Ironwood Concepts is having a foundation that is level and square. Our kits can be put together seamlessly if the right steps are in place before hand. We had a concrete pad poured for this build, which made it pretty easy for us.
We also decided to stain our wood pieces a sleek black. This is not to say that everyone needs to stain their build, but it is up to you how you want your kit to look! Staining our pieces before hand allowed us to organize which piece lined up with the number in the manual. Before getting to the site we had all of our kit organized by number which saved us a ton of time, and helped our build go smoothly.
The last key thing before we get into the build, is make sure you organize your hardware! Obviously door handles and hinges are pretty self explanatory, but the screws, bolts, nuts, and washers are a little harder to differentiate. We recommend having all of your hardware in separate bags, labeled with the manual piece number.
The Building Process
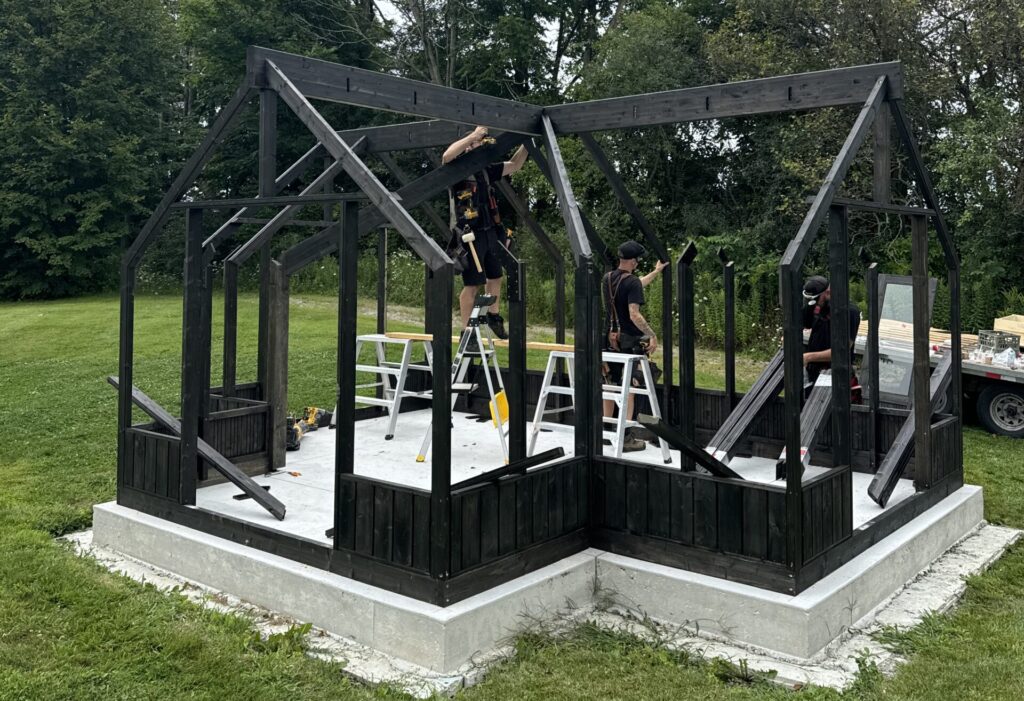
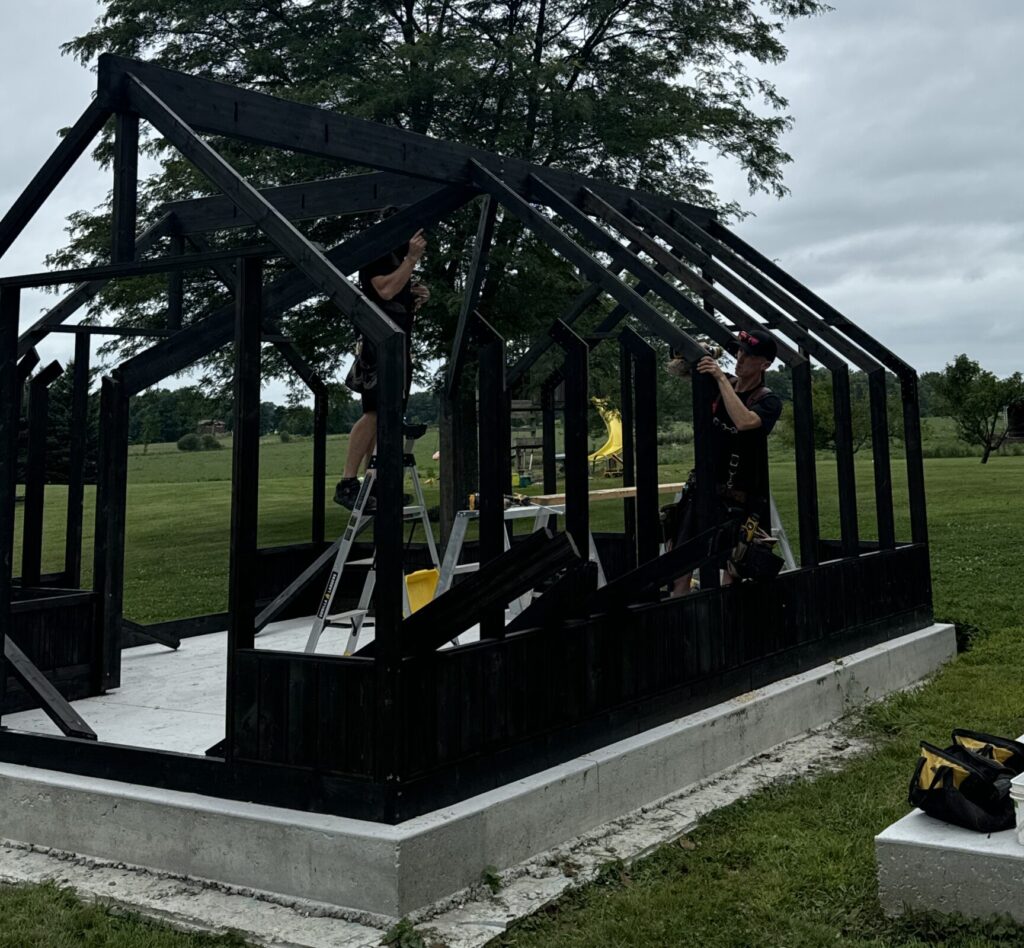
We started out with laying out all of our tools, hardware and kit pieces. We then cracked open the manual, and started to build! The First Step is relatively simple, but you need to make sure it is done correctly. Installing the foundation pieces. Ensure that all of your pieces are square, and installed exactly how the manual shows. This lines up the rest of the build so it is crucial for the success of your project.
Additionally, we decided to anchor our build to the concrete build with some Tapcon Screws. This was an extra step we thought could help our kit last for years, and keep the greenhouse very secure.
The next step was installing the bottom panels, and the side walls. This step was quite simple, as the side walls lock in the bottom panels while installing. The manual then said to install all the attaching rafters, and then installing the main beam across the top. We decided to install the door frames, the main beams, and attached the rafters on after. This allowed us lock in the rafters attached to the main ridge, and we were quite happy with our decision.
Key Tip
Ensure when installing the front corner bottom panels that you are installing them correctly. The window gaps are different, and this can effect the whole build! Make sure you are sticking to the manual exactly.
After installing the final rafters, it was time to start carefully installing the glass. The biggest advice we came up with, is have at least 4 rubber clamps with you before you start installing the glass.
We installed all the side panels, and doorway glass first. The massive thing to remember is to have the pieces of trim ready to lock in the windows. Once you get your first 3 panels installed, it becomes very easy and you find a rhythm quite fast.
Next is the more difficult part. Pull out the ladders and have an extra set of hands. It’s time to install the roof glass. We recommended doing all of the glass except for the ventilation windows. This allows you a hole to install all of the surrounding glass plus the ridge cap that follows.
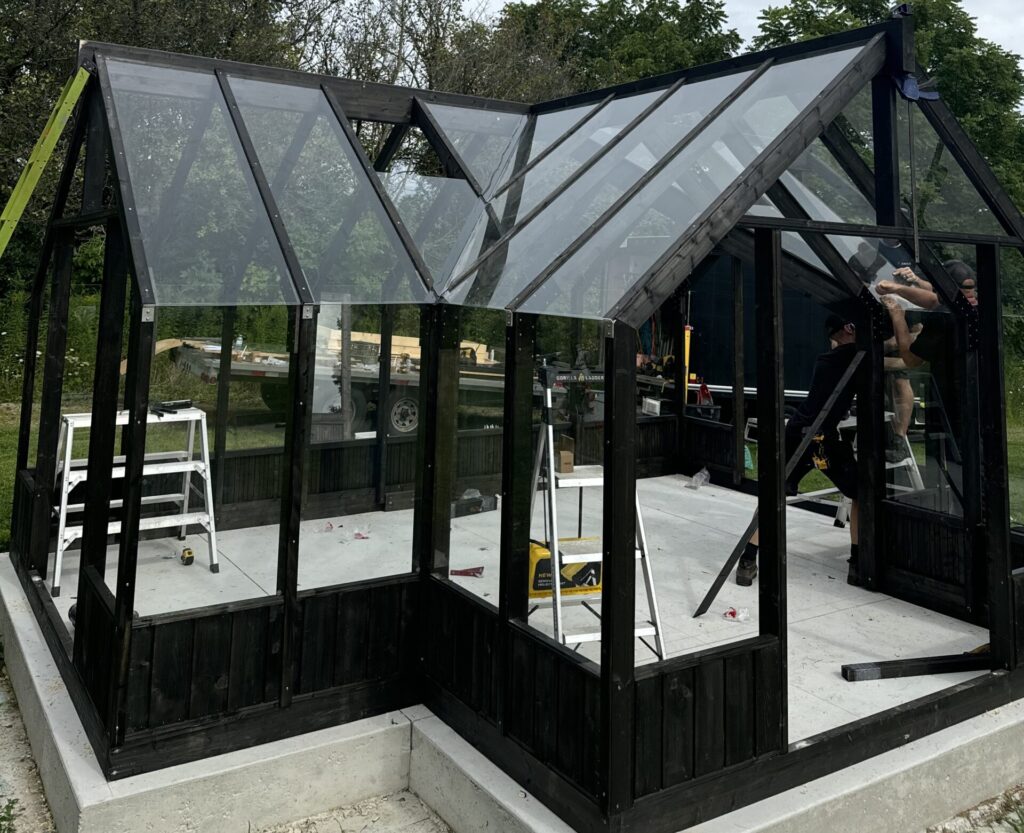
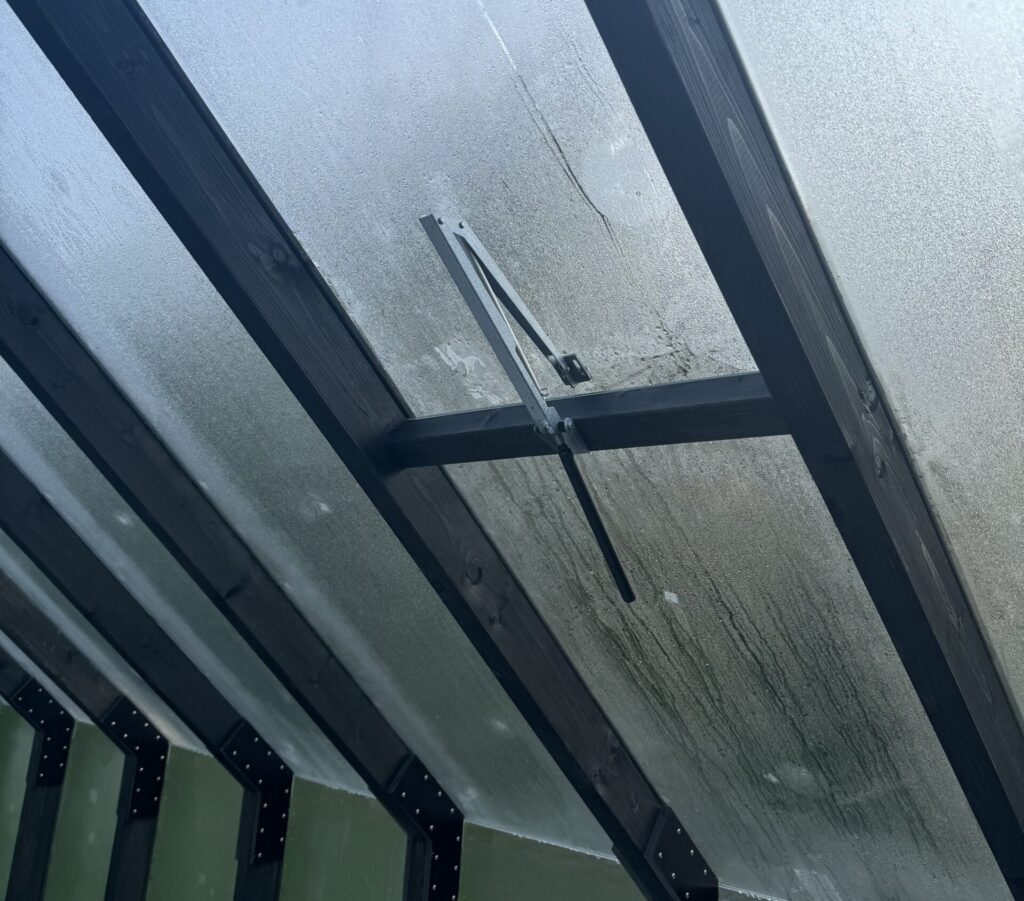
Finally to finish off the roof, it was time to install the ventilation windows. We had all of the hardware prepared, and installed the hinges to the glass before bring it up to the roof. This was the easiest way we found we could install the windows. The difficult part is the last 2 windows, having to reach around the glass you’re installing to screw it into the main beam. With an extra set of hands we did figure it out.
To finish up, all that’s left is to install the doors and door hardware. And that’s it! We finished installing our greenhouse.
Bonus Step
Glass Cleaner. After installing the greenhouse, there is definitely a couple marks on the glass. While your ladders are still around we recommend wiping the glass and saving yourself some time later.
Additional Highlights
One awesome key feature is the door stops that are easily installed, for when you want some extra wind flowing through the greenhouse. This allows you to keep the doors swung open, and keep airflow for you and your guests.
Our personal favorite feature are the automatic ventilated windows. Pulling them out of the box we had no idea how these would work. We installed them, and they left the windows wide open. Immediately we checked the forecast for the night to make sure we wouldn’t be flooding our build overnight. To our surprise when we showed up in the morning, there were the windows fully closed, sealed with the rest of the glass. As we worked for the rest of the day, the windows slowly opened along with the rising temperature, and helped keep the internal temperature quite comfortable.
Closing Remarks
Overall our team had a great time putting this together. From solving little puzzles, to seeing cool features surprising us it was a great experience.
These greenhouse kits can be used for the backyard gardening experience you’ve always dreamed of, or a beautiful seating area for the family. Check out our social media for more videos and pictures of the build!